Hi there and welcome to another jewelry making tutorial at Ringsforwomen.org. Today we’re going to make this really nice multi-strand bracelet, and the cool thing about this project is it really only uses three different jewelry supplies.
A little glue and a pair of scissors are the only tools you’ll need. So this bracelet design is dependent upon having this kind of a clasp.
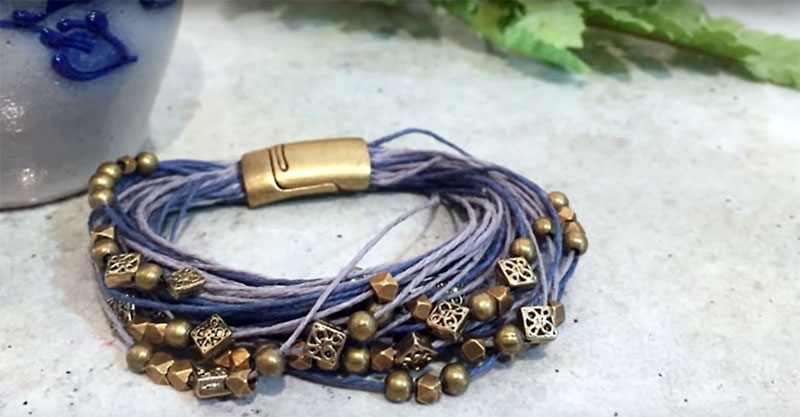
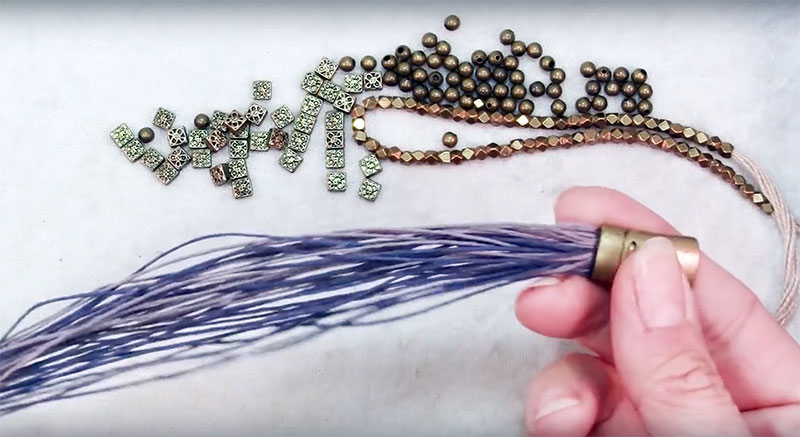
This is a mini Regaliz brass plated magnetic clasp. I talked about it in my article on magnetic clasps, and it’s really intended for gluing pieces of leather into it and then making yourself a bracelet or necklace, but you don’t have to glue only leather into it. You can glue whatever you can think of that will work.
And so what we’re going to use is a cord, and I have here a few different types of cord. This is hemp cord, and it’s dyed in different colors. This is a cotton braiding cord, again lots of different colors. You could even use suede. These are narrow suede strips. You could use these. You could use silk cord. Really whatever you want.
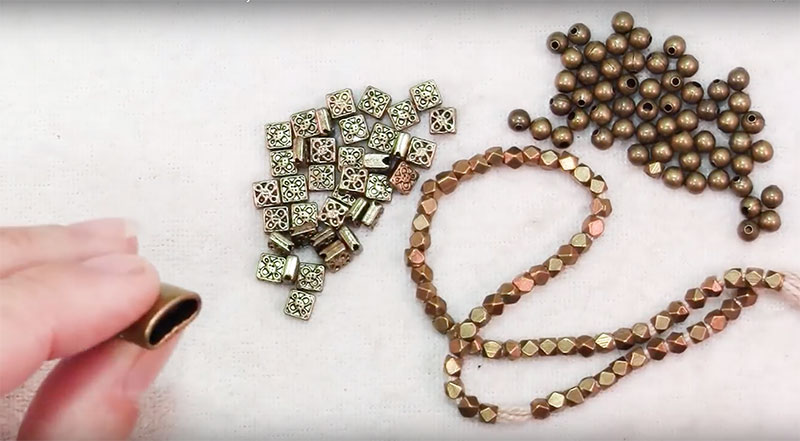
One tricky part I found was trying to determine just how many strands I wanted to put in there because I wanted it to be nice and full and not look skimpy. So what I did was, I pulled one of these bundles of my hemp cord off the card and then just kind of experimented stuffing different amounts in there and so I think that probably around 30 strands. Then the only other thing you need besides your clasp and your cord is some beads. These beads need to have holes large enough for the cord to go through and they can be whatever you want.
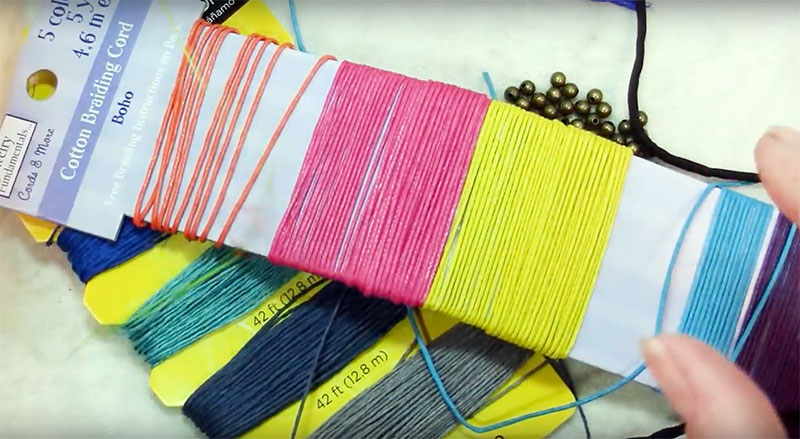
I’m going to go with these two blue/gray cords, and I thought it was kind of an interesting contrast to have the warm brass and gold colors along with the cool silvers. I think it will make a nice elegant bracelet.
So once you have your cord chosen, you just need to cut several lengths, and I’m going to cut mine a little longer than I know I’ll need. I’m going to cut mine around 8-8.5″ long. I want to have enough so that I can trim them off neatly on the other end. So I’ve gone ahead and cut all my strands. I ended up adding in another 10, so that’s 40 cotton strands, but your count will depend on of course the clasp that you have and the type of cord you choose.
And what I’ve done is about an inch from the end, I’ve gathered them with a rubber band, and then I’m going to trim them just so that they’re all flush and even. So nice sharp scissors that will get you that all done in that one clean, smooth cut and that looks pretty good.
Now there are all sorts of choices when it comes to glue, but you definitely want to use something nice and strong, and I love two-part epoxy for its strength, and you have choices in two-part epoxy. There’s this one that you can get in the craft store, and it sets in five minutes, which is lovely. Although sometimes I find I want a little more time.
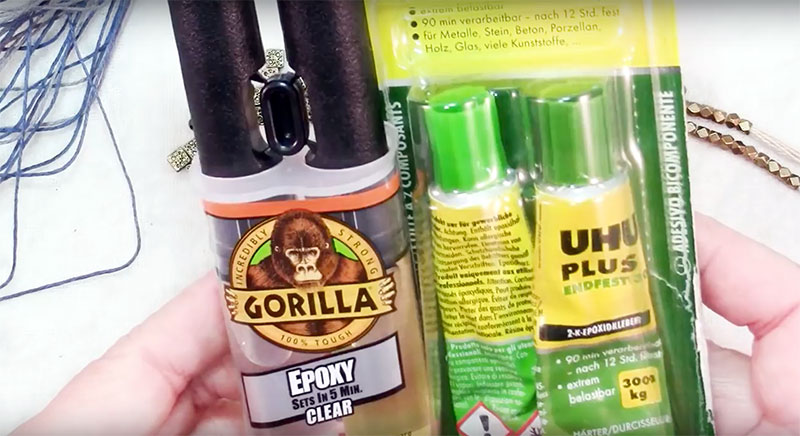
There’s this one, and I’ll have a link to this one at my blog post that gives you 90 minutes working time, which is maybe a little bit more than I want, but it’s kind of a comfort to know that I don’t have to rush with this. So I’m going to use this.
There are 90 minutes of working time, and then it takes 12 hours to cure completely. So you do kind of have to plan ahead if you’re going to use this glue. It’s not for the last minute project. I always just dig in my trash for a scrap of paper to mix my glue on, and I do kind of prefer these little tubes rather than the plunger. That’s because it can be tricky to get equal amounts out of the plungers, but the tubes, you just squirt out each one. So you need an equal amount.
And there are safety things on these. You may need to work with good ventilation and all that. Make sure you read all that when you’re using this kind of glue. And then you want to stir it very thoroughly.
Supply list and links to products:
- Magnetic clasp meant for the leather cord
- Cording
- Beads that will fit on your cord, faceted brass beads are used in this tutorial
- 4mm round brass beads and some diagonally drilled square beads
- Two-part epoxy
- 5-minute epoxy
- 30-minute epoxy
- 90-minute epoxy
- Toothpick
- Scissors
What I’m going to do now is just apply some of this glue right in the center of this bundle because that’s something one of my readers mentioned was being concerned that the pieces would come out of the center and that’s a good concern to keep in mind. So I don’t want to go too far down. I don’t want the glue showing on the outside, so just like the inner 1/8″ or so. Get some glue all over those ends. This isn’t super deep so I don’t want to put too much in there, but I do want to get glue all around those inner edges and on the bottom. This is where five minutes might not be enough time if you want to do this carefully and neatly. You might find yourself rushing. So I’d rather have to wait longer for it to dry and just be able to take my time doing this.
Let’s see if I can get this shaped right so I can stuff it right into that clasp. And see what I mean about wanting not to have to rush. You just kind of want to do it really neatly and get it done nicely on your first try if possible. And that looks pretty good.
Alright, now I got a little bit of glop over here. So I’m going to take this and throw it away. I’m done with that. Thankfully that’s on the underside. I’m just going to take a baby wipe and wipe up all that visible glue.
So here I am back after about 24 hours, and this is completely dry and then just smooth these out because they were kind of kinked.
I mentioned using an iron, but you could also use a flat iron for your hair, and it works great and it actually uses a little bit less electricity. So that’s what I did. I smoothed out all the strands.
Now it’s just a matter of adding your beads, and you can add as many or as few as you want. I’m going to start with maybe six per strand and see how that looks. And if you need to, you may have to trim your cord a little bit, like at a point and you can also if it’s really tricky, you can add a little glue to the end of your cord and let it dry. That will make stringing easier. So I’ve gone ahead and strung on my beads, and it will vary, depending on the size clasp you have, the cord, the size of the beads, just how many you want to add.
I realize that having beads on every single one of these strands would be a bit much, so I put six beads on about half of the strands. I ended up with 30 on this, and I think that looks good.
So now all we need to do is glue the clasp and the other end, but that can be a little tricky. There are a few things I figured out along the way. First of all, you kind of wants to shake all those beads down to the other end for now just to get them out of your way. Then you want to lay that out on a work surface, and kind of fan out all of your strands. This will help you as we’re pulling them out, so they’re all nice and even and the same length. And actually, I already tested this around my wrist and decided that I want to cut it right where this very shortest strand was.
So don’t be afraid to cut your strands quite a bit longer than you think you’re going to need because this is just at the edge of where I want it to be. So I’m going to cut all of mine to the shortest one. So I’m going to kind of pull that one out, and get it over here and then I’m going to take something heavy or just find some way to clamp down this end, like that.
My glue bottle is heavy enough, and then you just start grabbing your strands one at a time, and you just want to be able to tug on it from the other piece of the clasp and tug on it so you can make them all the same length. So I’m just doing that and holding it with my fingers, and you just keep doing that until you have all of your strands in a single bundle.
Now when I started this, I had strands fastened together with a rubber band, but the problem with that and I lost a bit of the footage, that didn’t work out as well as I thought it would. So I’m not going to do that on this end. I’m just going to use my fingers to hold it nice and tight while I prepare it for gluing and put it into the clasp because the problem was when I took off the rubber band, it grabbed the cords and then pulled them out of that clasp. I’m going to grab my scissors and trim.
Okay and I’m just going to hold this nice and tight with my fingers. I’ve already mixed up some more two-part epoxy here.
Another benefit to using the stuff that takes longer. You can do it a little bit ahead, and I’m just going to do the same thing I did on the other end.
I’ve got to make sure I get all the edges, and the bottom of this clasp, but not so much that when you push the cords in it comes oozing out if you can help it. Then I want to make sure I get all of the ends and the edges, and I’m kind of holding it so that it is in that oval shape that the clasp is. And then plop all those in. Grab a little-wet wipe and clean up any ooze. You can use the clean end of your toothpick.
There we go. There’s a couple that needs to be tucked in. It’s best to do this clean and neat and in one motion and not have to mess with it. And then just like we did the other part, walk away. Leave it alone, and after the glue is completely dry, that’s it. This is what we have.
You can kind of spread those beads around, and if you want, before you clasp it, you can give it a couple of twists and what’s cool is with this kind of a clasp, the twists will stay in place.

 Cushion Cut Engagement Rings
I’m thinking about getting these bracelets for my boyfriend of almost two years for his birthday. He is 21 years old. Do you think they are too girly or would he like this?
I think it is girly! They are not masculine. I like it though, and the idea behind it 🙂